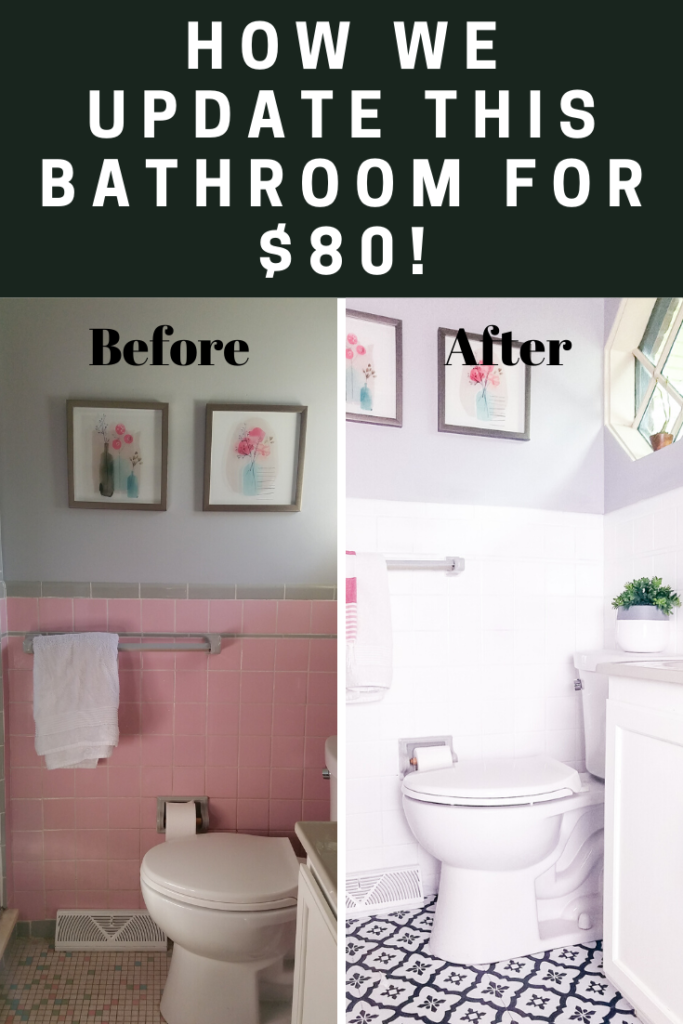
This post is all about painting bathroom tile using epoxy paint. Do you want to transform your old bathroom tile for $80? Today, I will show you how we update our bathroom by painting ceramic wall tile using Rustoleum tub and tile and installing peel-and-stick tile.
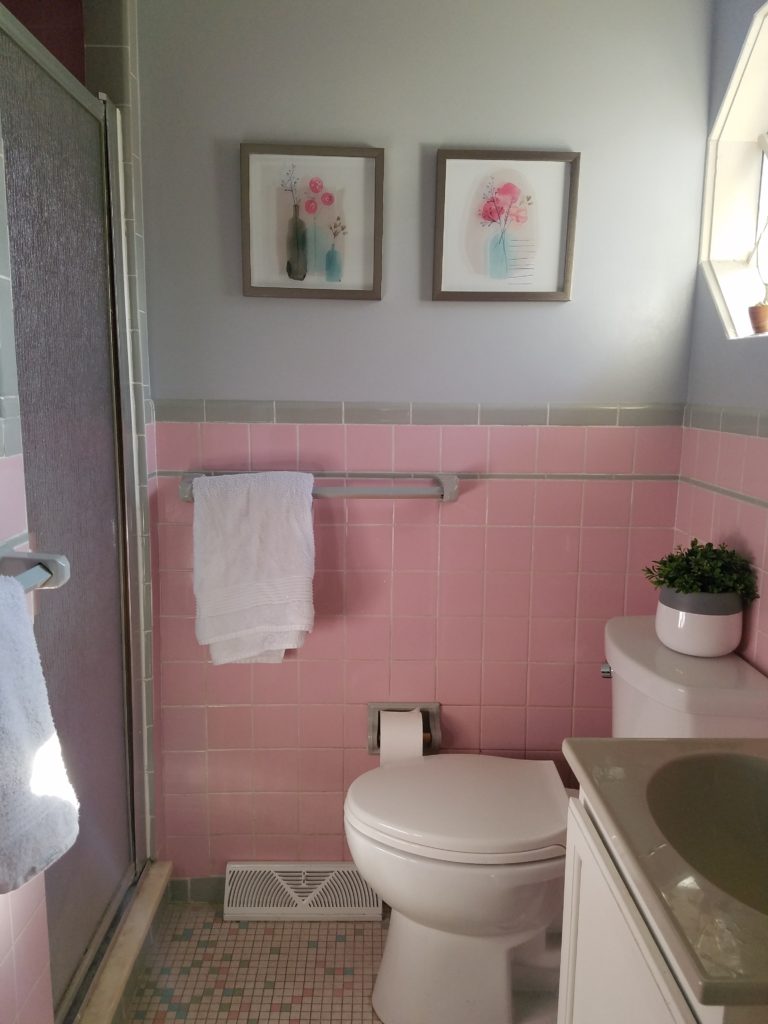
Our small master’s bathroom needed an update. We have a pink tile in our bathroom and I’ve been wanting to update it on a budget until we saved enough money to do a remodel.
When we moved to our house in 2012, the bathrooms needed the most work. We spent about $15K on move-in renovations which included $1K for a linoleum-tile upgrade to the main bathroom floor. To our surprise, a few months later we discovered a leak in the main bathroom.
It looked to be on the serious side and as repairs were now necessary, we figured we might as well look into cosmetic improvements. We had been considering updating the kitchen, but the leaky bathroom was our priority and needed to be fixed immediately.
We asked our contractor for an estimate to repair, remodel, and tile our main and master bathrooms. He came back with a $15K and $10K estimate respectively. Our jaws dropped!

After having already spent a lot of money on move-in renovations, we decided it would be unwise to continue to deplete our savings. We opted to fix the necessary. We had the main bathroom renovated but not the master.
I wanted to update our bathroom on a budget. The first thing I did was remove the ugly wallpaper. Neither my husband nor I am fans of it.
Then I painted the walls. I choose a cool gray tone. And for a long while, that’s all that had been done.
Years later we had the toilet, light fixture, and mirror replaced.
Months after that, I painted the cabinet white.
Some people love retro-style bathrooms. I’m not one of them! Every time I looked at those pink tiles I cringed. And if you hadn’t figured it out, I had been tolerating it for years. It still needed updating.
That brings us to 2019.
I spoke with hubby about removing the tiles and putting up new drywall or at least skim-coating the walls. That task with a contractor came in at about $1K and that excluded the shower stall. Hubby asked me to look for alternatives.
We were on a budget as usual. And as usual, I got creative.
I canvassed Pinterest for ideas and saw that others had resorted to painting their old tiles and tubs. I checked with Hubby about my new idea to paint the tiles. He gave me a thumbs up figuring it didn’t turn out, we could fall back to having the drywall put in.
Can you paint bathroom tiles?
Yes. But prep is key to making the paint adhere well to the tile. Read the step-by-step instructions below on how to prepare your tile before painting.
Full disclosure: this post contains affiliate links.
Supplies I used:
- Peel and Stick Floor Tiles similar here
- Rust-Oleum Tub and Tile Kit x2 and here
- Respirator similar here
- Paint Roller Frame
- Foam Roller
- Paint tray
- Painter’s Tape
- Paint Brush
- Very fine sandpaper
- Black cabinet pull
I bought the first 3 items as I already had most of these supplies on hand.
How To Paint tile using Rustoleum paint
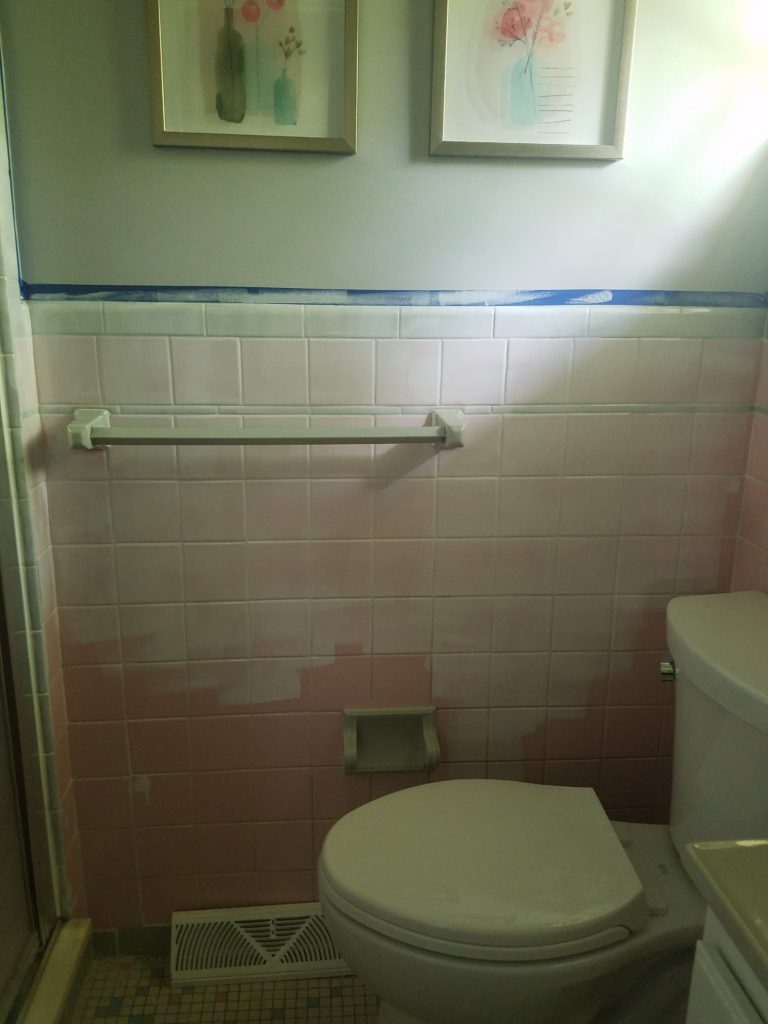
- Prepare and clean the tiles using a cleaning product. I wiped the tiles using a sponge and wiped them dry using a clean rag. This is crucial to avoid having the paint adhere to dirt or mold.
- To improve bonding, I sanded the tiles lightly with fine sandpaper. I did not bother cleaning the grout since I’d be painting over it. Wipe away the dust with a clean rag.
- Tape the edges, fixtures, sink, and everything I wanted to protect from the paint. I didn’t tape off the toilet lid because I figured it’d wipe right off Porcelain. Wrong! It does not come off easily which makes it ideal for painting tiles. Tape all the stuff that you don’t want to get painted.
- Put on the respirator and gloves. Open your windows and turn on the vents and /or fans. I wish I had opened my windows (which are painted shut and have been since we moved in), and run several fans before I started painting. I didn’t anticipate how noxious the fumes would be — really bad!
- Mix part A and part B separately and mix with a paint stick. It starts off runny but thickens over time. The gloves are important because this stuff does not easily come off.
- Start painting. I used a foam roller to get a smooth finish. The only issue I had is that the stuff, in addition to sticking like Superglue, breaks down the foam on the roller. I had to change the roller once it deteriorated to avoid leaving bits of foam in the paint.
- Let it dry for at least one hour before applying a second coat. I painted on two coats but it could use another coat.
- Allow the paint to dry for 3 days before exposing it to water.
Tip: Make absolutely certain the area is well-ventilated. Get your kids and go to Chick-Fil-A because the fumes are overwhelming even from rooms away. Hubby and I slept in the guest room for a couple of days and we could smell it even there. It took about 4 days for the fumes to completely dissipate.
Installing the peel-and-stick tile floor
The floor needed help. It really did. I’m not just saying that! The flooring looked so ugly and dirty. I hate it! I know I had to do something that’s easy to install because we are not handy.
I did some research and decided to go with peel-and-stick tiles. They are budget-friendly and DIY friendly so I thought peel-and-stick tile was a good option for us.
I love Moroccan-pattern tiles. I chose a black pattern for its contrast against the now-white tiles.
I started laying the tiles but had trouble figuring out how to cut and fit the tiles neatly against the room’s fixtures. I asked Hubby for help.
He consulted the Oracle which he also refers to as YouTube (watch the video here) and asked it about the cutting techniques. It involved using paper first to pencil out and cut templates. He made sense of it and laid the floor in a couple of hours.
Except for cutting around fixtures, installing peel-and-stick tiles was super easy. If we can do it, you can do it too!
Lastly, I asked Hubby to install the black handle. There are still a few touch-ups left, but I’m thrilled with the progress.
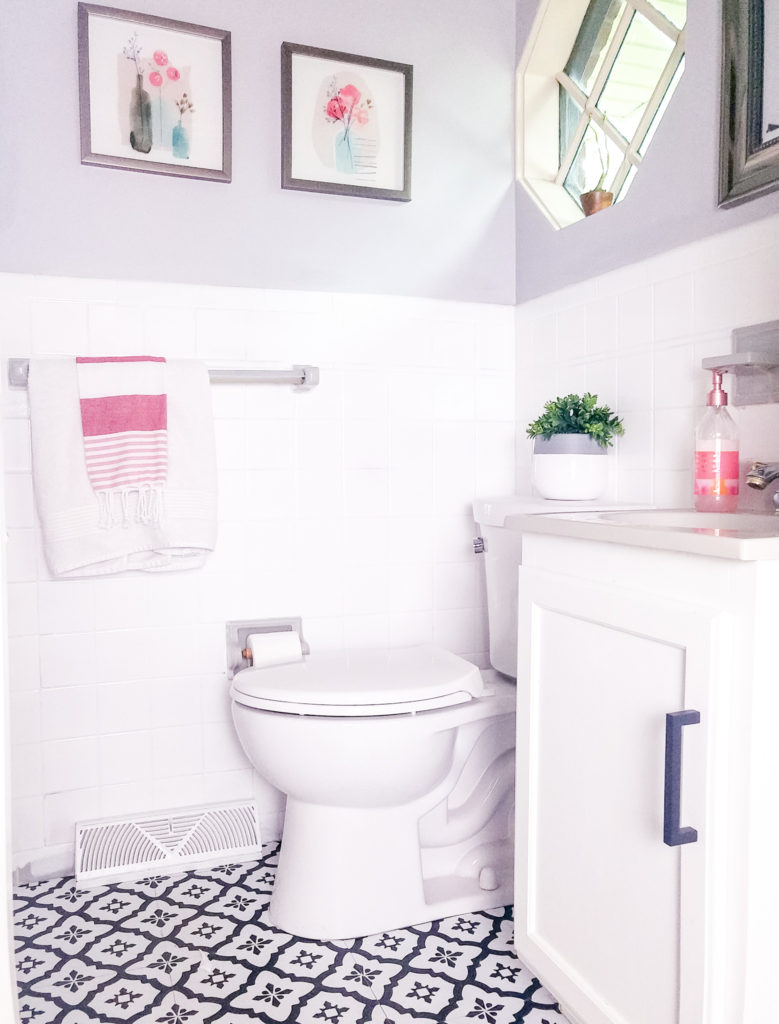
I couldn’t be happier with how it turned out. Our bathroom looked way better and we only spend 80 bucks! To me, it was so worth it.
Painting tiles and installing peel-and-stick tiles really transformed our dated bathroom. Have you painted tiles before? Would you paint your old bathroom tile?
Let me know in the comments below.
Jennabel
Update – We decided to update this bathroom due to mold issues. You can read about our modern Mediterranean bathroom here.
For more tips, please watch this video tutorial.
Other Posts You May Like:
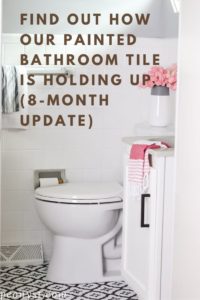
How our painted tile and peel-and-stick flooring are holding up
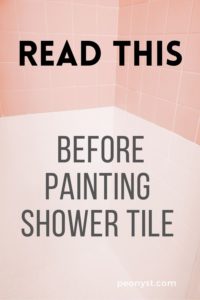
Painting Shower Tile (Should You Do It?)
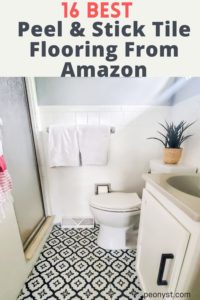
16 Best Amazon Peel and Stick Tile For Your Bathroom
Modern Coastal Meets Mediterranean Bathroom Reveal
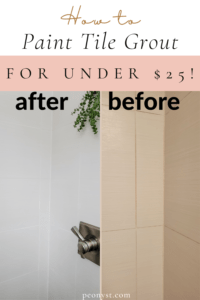
How To Paint Tile Grout (The Easy Way)
How To Make Your Grout White Again
Pin for later:

Wow! What an amazing transformation!
Aw. Thank you, my friend and thanks for the support. I appreciate it 🙂
The tile work looks perfect! Good for you for figuring out a way on a shoestring budget. It’s amazing!
Thank you so much, Kathy. I believe that you don’t have to spend a fortune to have a beautiful home. You just have to be creative and be willing to do the work 🙂
Did you lay the peel and stick over the existing tiles? Same dilemma here!!
Hello Ashley,
Yes, we did. Good luck!
Looks awesome! I’m curious about the peel-and-stick: I’ve contemplated it, but nervous they wouldn’t hold up to moisture. And to be fair, I haven’t really dug in deep to any reviews.
Thanks, Lisa. It depends on where you are planning on using it. I wouldn’t recommend it on areas that get lots of traffic like the kitchen. But there is a glue that you can use to make it adhere to the floor better.
We installed luxury vinyl tile in our basement a couple years ago. It’s waterproof and more durable than the peel and stick tiles. That might be a better option for you.
What paint did you use to paint tiles?
Hi, Debbie. I used Rustoleum tub and tile paint. Here’s the link https://amzn.to/2OdzsMk.
One of my fave budget renovations yet. It looks amazing.. and even better, done on a budget!👏🏼 I’m doing something to similar- already used the Rustoleum tub and tile and now contemplating what to do for the floor. How exactly did you trace around the fixtures for the peel and stick tile? I have the same (tiny) tile floor and I’m trying to decide what to do. Thanks so much!
Hi, Blakely. Thank you very much. We used this trick for cutting tiles around the toilet https://www.youtube.com/watch?v=kHUUsncikxA I hope that helps. Thanks for stopping by.
Oh duh!🙄 once you see this. Lol. Thank you for linking this. My peel and stick is a tad “Frankenstein-y”. Thank you again.
You’re quite welcome, Sally. Have a great day!
I have small tiles like your bathroom. I couldnt see them showing strangely through the sticker tiles. I felt since the tiles werent the same size it would look strange. I didnt see a close up but could you see the smaller tiles through?
Hi Whiteney,
I couldn’t see the small tiles through the peel and stick tile at all! Hope that helps 🙂
The remodel looks amazing! Such a great job! I have the same small tiles. Do the peel and stick tiles stick well to that type of small tile? How did you prepare the existing floor tiles?
Hi Diana,
Thank you! The tiles are holding up well so far. I did not do anything to prepare the tiles. Just make sure it’s clean so the tiles will stick well. Good luck!
We are currently attempting to do the same thing but not having good luck. What did you use to paint the tile that you were rolling on? My husband bought the tub and tile kit In a spray can version and used that after he etched the tile and it didn’t cover at all. Wondering what we are missing.
Hi Audrey,
I’m sorry but I have no experience with tile etching. I used rustoleum tub and tile kit (link above). I’ve never used the spray kind. I sand the tile with a fine grit sandpaper and cleaned it thoroughly before painting. Hope this helps.
What kind of paint did you use for the tiles?
Hi Jenna,
I used Rustoleum tub and tile kit. Just click the link above. Thanks for stopping by 🙂
This is EXACTLY what I have been imagining doing!! What did you do for the shower tile? Did you paint that also? You’ve convinced me that I need to give this a try. Our master bathroom is small with just a shower and old green tile. it just needs a nice cosmetic change
Hi Val,
I did not do the shower tile yet. I am planning on doing it soon. We have to change our shower fixtures then I can start painting. I’m glad I could help. Good luck and thanks for stopping by 🙂
How is the paint holding up so far? I have a bathroom that has yellow tile and one with blue tile 🤦♀️ I am wanting to do this as well. Small bathrooms built in the 60’s. That tiny yellow floor tile ughhh lol january 5, 2022 not sure how long ago you did yours so trying to see if the painted wall tile is still doing well.
Hello!
We painted our shower tiles but unfortunately, they did not hold up well. The paint started to peel and crack. Our tiles on the outside of the shower are holding up great. We are going to renovate the entire bathroom soon due to mold issues. Hope this helps.
I went to Home Depot a week ago and wanted to buy paint for my tiles. I was soooo hesistant about doing it myself but I ended getting to do my restroom today. Like your restroom , mine was Blue & Yellow! Horrible! I just got done doing the first coat! And I was like OMG what did I do! But now looking at your Pinterest and seeing we used the same material! I feel so much better about my decision thank you for posting this!
Hi Martha,
Aw, I’m glad this post made you feel better.I was a little scared at first too. But I was so happy to see the transformation. Rustoleum tub and tile kit is awesome. Good luck. I’m sure it’ll all work out 🙂
Looks great! I’m just wondering how you delt with the transition from the bathroom floor to the hall? Did the tiles raise the floor enough to mess with the clearance of the door or the transition?
Hi, Kaytrinn. The peel and stick tile is very thin so it wasn’t an issue. Hope I answered your question. Have a great day!
When you prepped the tile did the finish dull? We tried sanding, but you can’t tell a difference.
Hi Ashley,
No, it did not. I just did a light sand for the paint to adhere to the tile.
Did you paint the floor tile before putting down the peel and stick or just painted the wall tile?
Hi Jamie,
I did not paint the floor tiles. Hubby just installed the peel and stick tiles over the existing tile.
Hey Jennabel, I see it’s been almost a year since you’ve painted the tiles. Wondering how they are holding up? Do they scratch easily? I have the same tiles in grey and black with PINK everything else and cant afford to redo it all right now. I’m just worried about knicks and scratches?
Hello Natasha,
The tiles are holding up well. I did not notice any peeling or scratches. Rustoleum is the best paint I’ve ever used. I wrote a post about it here https://peonyst.com/how-our-painted-bathroom-tile-and-peel-and-stick-tile-are-holding-up-8-month-update/. Have a great day!
Hello! We used this paint yesterday on our bathroom wall tiles, and after two coats it looks TERRIBLE. I’m in gull panic mode now. How many coats did you need to do? We are praying that a few more coats will do the trick!
Hi Lindsey,
I did two coats. Depending on the color of your tile you may need to do 3 coats. I hope this helps. Good luck!
Our 1st floor bathroom looks just like your’s did initially. Ours has pink tiles on the (rather long) counter top as well and an ugly mirror too. DYT that paint would work on the countertops too? I’d rather do something better looking than the glossy pink porcelain tiles but I’m at a loss as to what I could do that would look nice and hold up to the daily abuse of it being our primary bathroom & the kids (12&13) only BR (it’s next to their bedrooms). Do you have any ideas about making the counter top bearable to look at but hold up to getting water from the sink on it very regularly? The kids are not the best about wiping up water that gets on counters between the hand washing and drying transition 😣.
Hi Alexa,
The paint would work but I honestly don’t think it will last. It’s not a permanent fix. If you are planning to replace the countertop in the future then I think painting would be a good temporary solution. Hope that helps and good luck 🙂
I’d love to try the peel and stick tiles, question though. Any advice or feedback on being able to put them on ceramic tile in the bathroom?
Hi Jennifer,
We did not do much prepping before installing the peel and stick tiles over the ceramic tiles. We just made sure that the ceramic tiles were thoroughly cleaned. Hope that helps 🙂
Hi! This looks amazing.
Do the tiles look nice against the tub and stuff? Any weird transition points or gaps?
Also did you have cracks or old grout on your pink tile? Mine seems to be drying out and just want to paint over it all…
Hello!
Thank you! I noticed some cracking on the grout too. I think this is normal because it’s not a long-term fix. You may paint it over if you like. We have mold issues in our bathroom so we are going to remodel it soon. Thanks for stopping by!
Wow this bathroom transformation is amazing! You are totally inspiring me to give this a try! We are going to do some bathroom cabinet painting in the new year. Can’t wait! Thanks again for sharing!
Hi Jackie,
I’m glad you found this post inspiring. Good luck on your bathroom project 🙂
Thanks so much for sharing your tiling tips! We are having some water damage restoration done in our bathroom & I want to make a few design changes with our tile when we do! Totally using this as inspo!
Sounds great! So excited for you. Thank you for stopping by 🙂